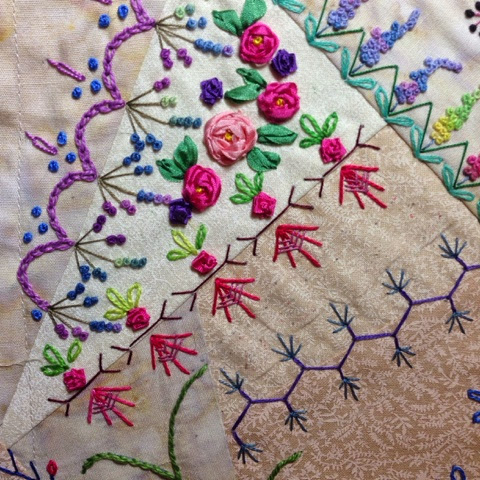
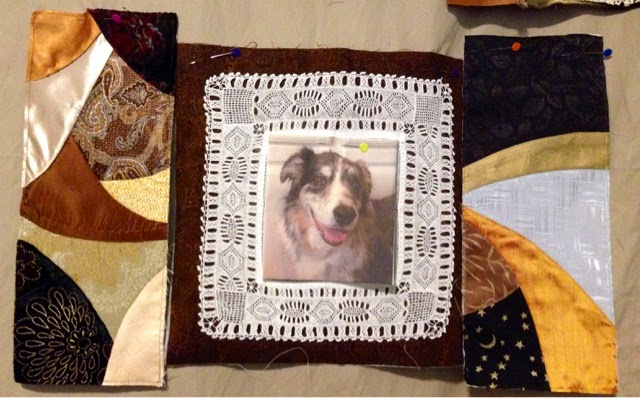
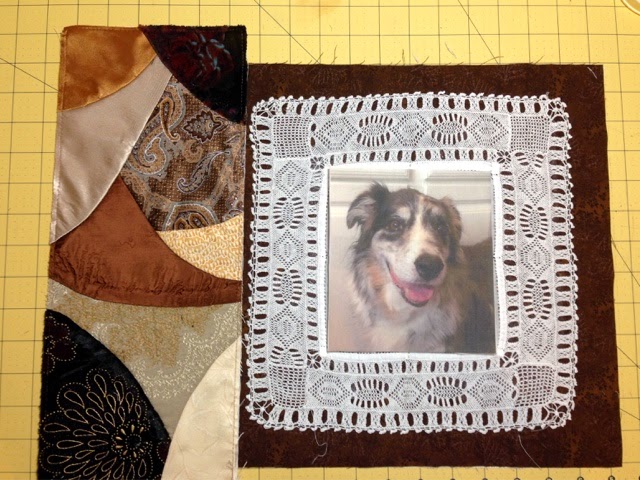
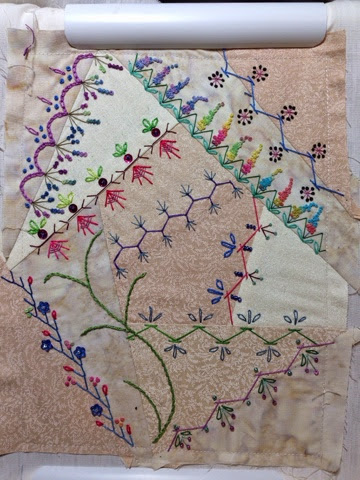
I have finished the embroidery on the two side borders, and the first pass on the top and bottom borders. Here are the side borders:
Pages
Monday, November 24, 2014
Progress on Benson's Memorial Quilt
I have finished the embroidery on the two side borders, and the first pass on the top and bottom borders. Here are the side borders:
TAST Week #140 - Threaded Cable Chain Stitch
Thursday, November 20, 2014
Completed CQ Basic Class Block
I have finished Kathy's Shaw's Basic Crazy Quilt class project, and look forward to her upcoming classes. I learned a lot and got to push the boundaries of my comfort zone.
Following Kathy's instructions, I triple reinforced the stitching on all the beads I had previously sewn on and I added some silver beads to seam #7 with the Cretan and straight stitches near the center of the block. These beads ain't goin' nowhere!
I added a silk ribbon dragonfly in the center as well as some dyed and beaded lace butterflies. The dragonfly was made with pale pink and white ribbon, as that's all I had, and then color was added with permanent markers. The wings are ribbon stitches, and the body and head are various sizes of French knots. My husband pointed out that my dragonfly is a little crooked, and he is. That's what I get for stitching until midnight. I followed one of Kate's wonderful tutorials over at for the dragonfly over at Crafty Attic.
Following Kathy's instructions, I triple reinforced the stitching on all the beads I had previously sewn on and I added some silver beads to seam #7 with the Cretan and straight stitches near the center of the block. These beads ain't goin' nowhere!
I have thoroughly enjoyed this class and am grateful to Kathy for all the knowledge she freely passes on!
Friday, November 14, 2014
Thursday, November 13, 2014
Take a Stitch Tuesday - #138 Barbed Stitch
I added some curves and French knots. This will be really fun on a CQ seam! Thank you, Sharon.
Here I have used it on Benson's Memorial quilt.
Thursday, November 6, 2014
Benson's Quilt : Trapunto, "Aussie Fur" Inner Border, Auditioning Trims
This evening I cut out the image of Benson in a circle (thank you fancy dessert plate) and then backed it with knit fusible, a layer of batting cut a little smaller than the smaller and affixed it with spray adhesive, then another circle of knit fusible.
I pinned a square of batting to the back of the background square, set up my machine for free motion, and outlined the leaves in brown polyester machine embroidery thread. Then I carefully cut the batting away, on the outside of the shape.
I ironed and starched my "Aussie fur fabric", sewed the three sheets together lengthwise and then cut them in long strips. I pieced the strips together and turned under the long edges. I applied this around the perimeter of the background square, thus hiding the border of blue flowers, which I found distracting. I made false miters at the corners by turning down the corners at 45 degree angles and holding them in place with fabric glue. I pinned all of this in place.
Using clear thread (my new best friend!!) I appliquéd my Fur Border. It lays very flat and was pretty easy to do.
I then placed Benson's image on the background square to audition trims. I plan to appliqué Benson in place raw edge, with a zig zag in clear thread, but I want to audition some trims to hide the raw edges. I tried four trims, and like two of them.
Here we are, pinned and glued.
Here is the back of the background square with the batting trimmed away.
Below is my fake mitered corner.
Close up of free motion stitching around motifs to make them puff out a bit.
Fur border appliquéd on. Benson is just sitting there for show.
The trim below might work if I dyed it with coffee. Strong coffee.
Below is my first pick for trim. My only concern is how to connect the ends.
This one seems too bulky and ordinary.
Below is my second pick for trim.
Benson's Quilt - Fur Photo Printed on Fabric!
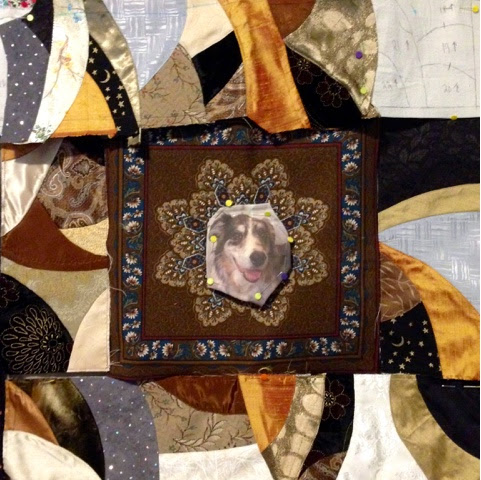
I am happy with my quilt so far. The four borders are pieced, although there is at least one area (near the top right) where I may add an additional piece (see third photo).
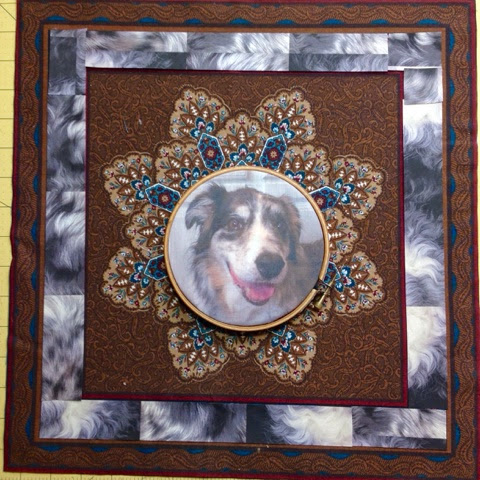
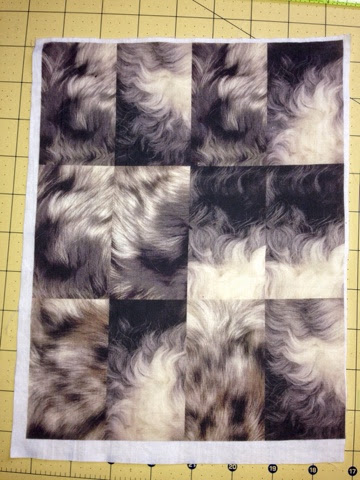
I feel that the frame print in the center has too much blue, so here is what I did. I took a number of photo's of Lily's fur (same color as Benson's fur was) and arranged them on my photo software to print all 12 photos with no spaces in between. Then I printed it on white fabric using the freezer paper method.
The next step is to cut the fabric into strips and piece it together. Or maybe sew the three sheets together and then cut into strips. Whatever is easiest.
I will then turn under the long edges and appliqué it over the square flowered border on the frame print.
This photo shows a mock up with the fur photos printed onto paper and temporarily glued to the frame. Benson is still in the hoop, but I have printed a larger and more saturated image to use on the real project.
This is one of my fur fabric sheets, printed onto fabric using freezer paper. I used the same sheet of FP three times and it kept working!
Wow! Printing one's own fabric has endless possibilities... More will be revealed.
Here is the finished pieced border. I think I want to assemble the quilt before starting the embroidery. I hope it won't be too unwieldy.
I want to do two steps of trapunto: one behind the photo of Benson, and one on the back of the two sets of "leaves" framing his photo.
Tuesday, November 4, 2014
Update on Benson's Quilt
Yay, the top border is almost done! I stayed up until midnight doing this and then just had to quit and go to bed. I am just loving this Freezer Paper Method! Thank you, Allie Aller! The turned under edges are appliquéd down with a narrow zigzag using clear there. It lays very flat and is a breeze to do. I use lots of pins and stitch slowly.
I am thinking of doing some trapunto work behind the flower shaped center medallion. And of course Benson's image will be round. I plan to reprint it, a little larger, and hopefully with better resolution. He is looking a little lost in the middle of all this!
I have used two methods to print the photos. The first is to iron freezer paper onto tight weave cotton, trim to exactly 8 1/2 x 11" and run through the printer. Then I peel off the freezer paper, and soak the piece in vinegar for 10 minutes to set the ink and let dry. No rinsing. The second is to print onto TAP paper, and then iron onto fabric.
Change of Plan
While looking through my stash I found a couple yards of this panel fabric and decided to audition it instead of the Fusions with the lace hankie. I like it. Since it has some blue, I can incorporate it better by using blue or teal in the embroidery stitches. Or cover the blue border with lace or trim. I also decided on the round photo of Benson in the center. The embroidery hoop was helpful to visualize this.
I also had made a major error in calculating the size of the borders, and had to add 6" to each of the top and bottom borders. This was pretty easy, using the Freezer Paper method. The added pieces on the bottom right are the four starting with the white.
Embellishments for Benson's Quilt
My dear friend Cherie is a dog lover, and also an expert glass bead maker. I asked her if she had any dog themed beads I could use to embellish my quilt, and she said she would send me these. Adorable!
I already had these, from a keychain she made me years ago.
Benson's Quilt - Third Border
Wow, the freezer paper method rocks! It is much easier than curved flip and sew and the pieces lay so flat. I am backing some of the nappy fancy fabrics with knit fusible, but not all. Silk does not not need it.
I may reprint the photo, to try to get it more vibrant, and I would like to enlarge the center square, to avoid trimming so much from these fun borders.
I will assemble it before starting the embellishments, as Allie suggests.
Monday, November 3, 2014
Progress on Benson's Crazy Quilt
Sunday, November 2, 2014
Start of Benson Memorial Crazy Wall Quilt
I wanted to do something to help me grieve my beloved Benson who passed on October 31.
I am using one of the lessons from Allie Aller's crazy quilting book.
The first side of the border is done using the curved piecing method. I am thinking of using the freezer paper method for the other three sides of the border. Or not.
I may assemble the whole thing before starting the embellishments.
Subscribe to:
Posts (Atom)


